displace
source: http://www.thegoldenmean.com
Displace Filter, Page 9 - Extreme Distortions
Are you still with me? You’ve endured eight brain bending pages of this tutorial, and watched a progression from dry mechanics, to simplistic ripple effects, to powerful practical applications of the Displace filter. Are you getting just a little restless with all of this practicality? Doesn’t it sort of feel like we’ve been driving a Viper in a 30 MPH zone? Time to hit the Autobahn. Time to cut this baby loose from carefully made and conservatively applied, simple maps. Loose from expectations and predictability. Let it roar!
Welcome to the world of the strange, the bizarre and the unpredictable. These are mysterious, uncharted waters. You’ll navigate by instinct — the road maps for these DMaps are sketchy at best. Displace can easily turn an image into something completely unrecognizable — and many breathtaking surprises can emerge from this process. I’ve given you the foundation to approach this page with at least a glimmer of intentionality. There is a tremendous amount of trial and error involved, and its attendant frustration. It’s a real time burner. But if you’re intent on making images like you’ve never seen before, this tool has to come to mind. Just remember:
- Almost anything you toss at Displace will produce astounding results, and
- Almost nothing will be pleasing on the first (or sixth) try!
I’m going to present four examples out of the billions of possibilities just to get your brain firing. I’ll comment where appropriate. Otherwise I think the images will speak for themselves. In order to really get a grasp of what is happening, I’ll demonstrate on two source files. As Kai noted in his pioneering Power Tips, this tool can warp an image so radically you have no real clues as to what has happened. Likewise, the regularity of a standard grid turns into an incomprehensible tangle almost instantly. Kai used a combination grid and photo (charmingly featuring Albert Einstein). This test target was very effective. Not being on close terms with Dr. Einstein, my take on the target is rather more modest. (Lest you think it vanity for an author to use his own mug for a test target, wait until you see what becomes of poor me.) After showing you the two targets, the four examples will follow this formula: the two DMap channels, notes on the Displace Filter settings, and finally the Displaced grid target and pictorial target. To keep variables to a minimum I’m using the same grid target file in every case; the only variation in the pictorial file will be with or without a black border (you’ll see why); expect the end result to vary significantly when you apply it to your images.
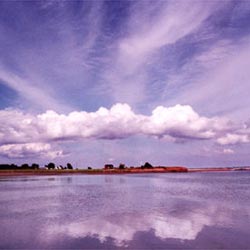
I’ve come to think of this process as similar to looking for pictures in cloud formations. After running the filter, I look at what happened and try to see something in it. Accordingly, in one case I’ll show you where I went with it. And a word of reality: these things didn’t just pop out. I made more than 50 in the course of writing this tutorial, and tweaked each of them repeatedly before I was close to happy. Don’t get all in a twist when something stunning fails to happen on the first try! The point of this is to use the tool with some control to make an appealing image, but also to make something unexpected. I promise the unexpected part. Appealing takes some screwing around!
Here we go. First the two test targets. This is the last time they’ll look like this!

You know the basic formula now. To squash, gradients are arranged to push in from all four sides:
To stretch, gradients are arranged to push out from all four sides:
Everything else is a variation on this foundation. I personally have worked mostly with softly flowing, organic shapes shaded softly with gradients. Intersections of opposing tonalities produce the most noticeable shift. I’ve found that Polar Coordinates (itself a frustrating and time consuming process) is a great tool for making these sorts of shapes. I’ve also made use of the KPT Gradient Explorer for a number of these DMaps. Note that Displace does not anti alias well; hard, sharp lines in the DMap will produce rather coarse effects, so I often soften them with a bit of Gaussian Blur. Note also that, with the Scale setting cranked up fairly high, the difference in outcome between Repeat Edge Pixels (which fills in the sides with the colors that were previously at the edges) and Wrap Around (which replaces displaced areas with stuff from the opposite side) will be extreme. Try both and see which you prefer for any given image. A black (or colored) border around an image will fill the displaced area with that color if set to Repeat Edge Pixels — a very cool way to isolate the displaced image against an easily selected background.
1) Curved Space
This is the basic expand map, modified with a contract in the middle. In the middle of each channel I made a feathered selection and ran the gradient in the opposite direction.

With displace set to 66, 66, wrap we see this oddity. Believe me when I tell you I was on the floor with amazement and amusement when I saw this spectacle (High “Holy Smokes” factor.)
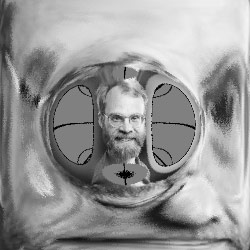

Now that’s a lot to grasp at once. The outside pushes out and the inside pulls in and everything that gets pushed off the edge comes back again, and the very center is mostly neutral gray. Little me stayed recognizable in the middle, but look at the outside!!! It wrapped all the way around onto itself. Here’s an animation to help you understand what has happened. I made the animation with settings of 15, 33 and 66 so you can see the warp effect unfold, and get a sense of where those wacky loops on the side came from. Note that this will only happen when the filter is set to wrap around. Don’t do this to a friend!
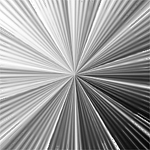
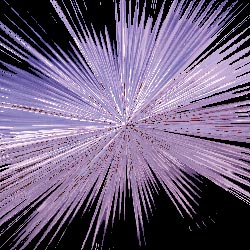
2) Big Bang
This map is modelled closely after one of Kai’s original works. The base gradient pushes in (at a diagonal this time), while the spokes of the gradient push out. Total image destruction when the filter is set to 66, 66, repeat. Note that here is a case of outlining the image file with a black stroke. Repeat Edge Pixels will fill in the sides with the edge pixels (black in this case), making it easier to composite into another file if you choose.
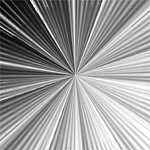
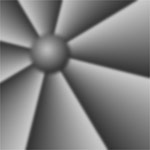
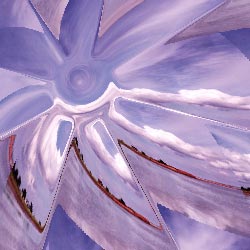
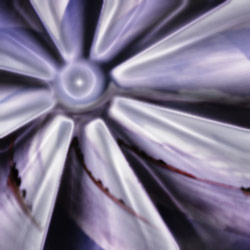
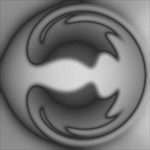
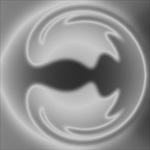
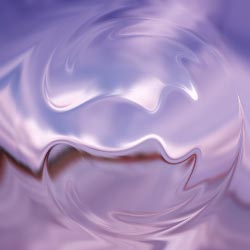
3) Spin
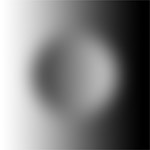
The DMap does not need to be centered or symmetrical of course. I made this one with a radial sweep in KPT Gradient Explorer, and then added a feathered circular selection to which I applied a plain radial gradient for the “hub”. Channel 1 was inverted to get Channel 2. (Note that the map was blurred some to take off the aliasing “edge”.) Filter applied at 66, 66, wrap (no black outline this time). It made me think of polished turbine blades; I liked it so much I added some lighting for a final version.

4) Irregular Shape
I’ll conclude with one utilizing a distinct shape. The shape itself emerged from a long, unrepeatable battle involving gradients, Polar Coordinates and channel blending with Calculations. Don’t ask — I couldn’t repeat it if I tried! The channels were toned down with levels. Displace was run at 40, 40, repeat (though no black stroke on this one). The effect was rather coarse, so I did it again after blurring the image file slightly and the result was much more pleasing.

Is there more to say? You bet, but this is the end of the tutorial — the rest is up to you. I’ve provided some of these DMaps and a few others in a “Starter Pack” which you can retrieve and get started with. (Be aware the zipped file is about 870k.) There is no way to demonstrate everything this tool can do. I probably haven’t even touched on what will turn out to be your favorite use of Displace! Take the information provided in these nine pages and run with it. I can hardly wait to see what you come up with!
Further Reading
We have covered a lot of ground, but in order to cover this much ground we have by necessity been somewhat superficial. If you crave more depth, you will find it plentifully available on the internet. I warmly recommend you read the remarkable experiments and tutorials provided at Lynn Halmich’s Tech Slop site. I encourage you to vist the site and spend some time reading what a real serious explorer has uncovered about the Displace filter.
Additionally, two articles written by photographer and digital artist John Paul Caponigro are quite remarkable and might open your eyes even further to the almost limitless possibilites Displace provides for simulating the random complexxity of the real world; first, read his intro to using Displace to create realistic reflections. After digesting that, treat yourself to the companion article which offers tips using layers with luminance masks, blend modes and curves to further finesse those reflections
--top--