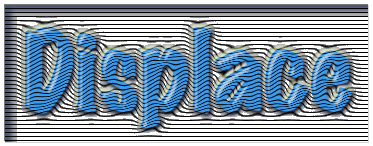
displace
source: http://www.thegoldenmean.com
The Photoshop Displace Filter
originally written for the GurusNetwork.com

You may have noticed an innocent appearing item lurking in the Filter>Distort menu: Displace. You may have stumbled across some odd, tiny files in the PlugIns folder, with odd, inscrutable names like “Schnable” and “Cees”. This potent filter has been a part of Photoshop since I started using the software seriously in version 2.5, and it has changed very little in the years since then. It is an extraordinarily flexible and powerful command, hampered by an obscure and counter intuitive interface which harkens back to Photoshop’s earliest days. Those attempting to figure it out through the usual approach (applying it with random abandon!) will be baffled and frustrated. However, this filter (and to a lesser extent its cousin the Glass filter) should be a core part of any seasoned Photoshop artist’s tool box because it can do the most extraordinary things in experienced hands.
This tutorial will explore possibilities. It starts slowly and simply, and gets faster and increasingly advanced as it goes on. It will be a survey, looking at potential uses for this tool, but I expect your own needs and imagination will take you far beyond my examples. I will seek to be thorough with regard to the filter itself, but broad and general where your own technique is expected to come into play. The intent of this piece is not to show you how to create anything finished; rather my intention is to expose you to the Displace filter and it's potential so that it’s power can advance your own designs.
As with Photoshop itself, everyone using the Displace filter does so with a specific goal in mind; Displace is powerful enough to accommodate many visions and purposes! It can also be applied to extremely practical applications, but we won’t get a glimpse of that until about page four. Follow along and learn how you can harness this distortion powerhouse for your specific project. The following nine pages are going to be a wild ride, so strap yourself in, stock up on nourishment and hold on tight to your mouse! Here's a quick preview of what we will cover:


As you might imagine with a filter that has remained unchanged through at least four software versions, many authors have contributed valuable information about this tool in print and online. I stand on the shoulders of those who came before me; I have very little original material to contribute. I have run across some extraordinary techniques in different places, but never all together in one document. While it is my hope to be able to tie together several authors’ unique approaches, I must acknowledge the contributions of the following pioneers whose writings I referenced while researching this piece: Kai Krause whose early Power Tip was the first I ever read on the filter; several mind boggling articles by Susan Kitchens; articles in PEI Magazine by Jeff Burger and Russell Sparkman; and Jack Davis and Linnea Dayton for inspiration in the glass and chrome section.
(As an aside, I’m proud to say that Kai’s Displace tutorials, along with all his other Power Tips, have been archived at the GurusNetwork. Some day make it a point to treat yourself to a spin through Kai’s Power Tips.
This tutorial has the following organization:
- Why?
- Description and Explanation
- Preliminary Demonstration of planar shift
- Examination of Interface
- Possible Applications for the Filter:
- Generate surface texture
- Distort an Overall Shape
- Shadows and appliques that conform to an irregular surface
- Suggest volume by distorting the “skin”
- Gross distortions as in glass or chrome
- Extreme destructive distortions
Why?
Photoshop, for all it’s complexity, produces 2 dimensional art, and was never intended to do anything else. Of course, as all 2–D artists, we have many tools to imply dimensionality. We have the ubiquitous drop shadow, suggesting a third dimension and a light source. We can produce highlight and shading with Lighting Effects or with masks (several excellent tutorials exist on the Gurusnetwork site), creating the chiaroscuro effect perfected by rennaisance painters. We know how to make bevels (and how to suggest inset boxes with small tight highlights and shadows on the opposite side). We can imply gloss or matte, smooth or rough, depending on the specularity of the highlight. But (you knew there would be a “but”!) these are mostly overlaid effects. They aren’t really great at describing sophisticated surface qualities, nor are they capable of distorting a surface in response to volume, irregular reflections or glassy refraction. We can pinch or bulge a texture with the Spherize filter, but what if our shape isn’t spherical? What if the surface isn’t smooth? Do we have to switch to ray tracing software to wrap a skin over a shape? Not necessarily. Long before Kai’s Goo or Live Picture’s Distortion Brush or Photoshop’s Liquify there was Filter>Distort>Displace!
What is it?
Briefly, the Displace filter will use the brightness values of one file to shift the position of, or Displace, pixels in another file. You may already be comfortable with the Lighting Effects filter, which can be used to modify brightness values in a layer based on brightness values of a specified channel. By contrast, Displace requires two separate files (which may or may not be of the same pixel dimensions - more on that later):
- your art work (which I will refer to as your “Image”) and
- the Displacement Map (my shorthand for this will be “DMap”).
Let me introduce the concept generally and get more detailed later. The pixels shift in the Image file can be horizontal or vertical, positive or negative; the instructions for how much to shift and in what direction comes from the brightness values in the DMap file, which must be saved as a .PSD file to work. Middle gray (value 128) in the DMap produces no movement in the Image whatsoever. Black and white (value 0 and 255 respectively) produce maximum movement or Displacement in the Image file. Shades of gray in between produce intermediate amounts of movement.
Black and white move the pixels in opposite directions; white represents maximum negative displacement, black produces maximum positive displacement. The DMap can use one or two channels. In a single channel DMap, white results in negative movement both vertically and horizontally; black results in positive displacement both vertically and horizontally. Thus a single channel DMap yields mostly diagonal movement. In a two channel DMap, channel one determines horizontal (“X axis”) displacement and channel two determines vertical (“Y axis”) displacement.
This is a lot to absorb right away, I know. I trust it will become more clear as I show some examples on page 2.
--top--