Flash MX MP3 player, Pt.1
source: http://www.thegoldenmean.com
2 — Laying the Foundation
The directory
Start by making a new folder for your project. Name it “music” or something descriptive like that. The Flash movie is going to need to locate the xml file and MP3 files and it will be easiest if they are all together in the same folder.
The .fla’s Layer Structure
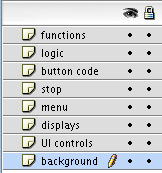
Create a new Flash movie and set the canvas dimensions to 300px wide by 200px high. I like to organize my movies with layers that keep important things separate and easy to locate and select. Accordingly, create new layers and name them as follows (from bottom to top):
- background
- UI controls
- displays
- menu
- stop
- button code
- logic
- functions
 Your layer stack should look like this illustration so far:
Note that layers 6, 7 and 8 will all contain ActionScript. They could all be contained in one layer but I find that separating the script by major areas of purpose (or “intent”) makes it much easier to find the code block I’m looking for. This is a purely personal approach.
With the “background” layer selected, draw a rectangle with no stroke and the fill of your choice. I do this rather than just setting the background color of the movie because someday you might want to dress it up with a more decorative background and the movie’s structure will support doing that easily.
![]() Select layer three (“displays”) and, with the text tool, create two single line dynamic text fields. Make each slightly less than half the width of the movie and place them side by side about two thirds of the way down from the top. Select the left text field and in the Properties Properties palette give it an instance name of “displayDuration_txt”. Select the right text field and give it an instance name of “displayPosition_txt”.
Select layer three (“displays”) and, with the text tool, create two single line dynamic text fields. Make each slightly less than half the width of the movie and place them side by side about two thirds of the way down from the top. Select the left text field and in the Properties Properties palette give it an instance name of “displayDuration_txt”. Select the right text field and give it an instance name of “displayPosition_txt”.

The ListBox Component
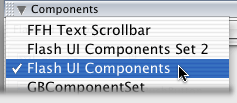
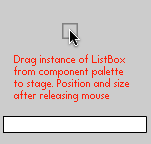
 Now add the primary User Interface element: an instance of the listBox component. Click in the first frame of the fourth layer — “menu.” If the Components palette isn’t already visible, select it from the “Window” menu. From the Component palette’s drop down menu, select the “Flash U.I. Components” set. Drag an instance of the ListBox component onto your movie’s stage. Be sure to name the instance in the Properties palette. I named mine “songList_lb” (note that in Flash MX the “_lb” suffix will trigger code hinting.) Size it to approximately 270px wide by 95px high.
 If you are accustomed to setting Component attributes in the Properties palette you won’t need to this time: we’ll set all that with ActionScript. Note that there will probably be some variation between what you see in the editing environment and what you see when you test the movie. The component doesn’t accurately know its final height until all the formatting information is compiled. You have to play it a little bit by feel.

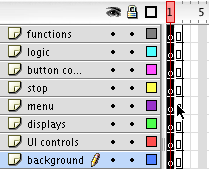
 Place your mouse in the second frame of the top layer (“functions”) and drag down to select the second frame in all eight layers. Press F5 to insert a new frame in all eigth layers. There are soon going to be a lot of variables and functions floating around so I like to have the movie last at least two frames to make sure all the variables are registered and available. This might be superstition or an urban myth, but it doesn’t seem to hurt anything.
Once your movie is more than one frame long, it will keep looping until stopped. We don’t want this to happen. Click in frame two of the layer named “stop” and press F6 to create a Key Frame. Open the ActionScript editor and type
stop();
All the code will have loaded by the second frame so there is no need for additional timeline frames. The stage is now all set — we’re ready to start the coding! If you would like to download my demo for the basic version of the MP3 Player, you may do so here. Please note that the demo does NOT contain any MP3 files and thus will not play any music. Including music would balloon the demo to a ridiculous degree. You will need to find (or create) some MP3 files of your own to experiment with.
On to Page Three where we build the external xml file.
--top--